Hi Sacha,
I've created a sample output based on your description of the project. You can view it here
https://s3-ap-southeast-2.amazonaws.com ... index.html
It's very simple and easy to do and we only need one External Image element in the skin.
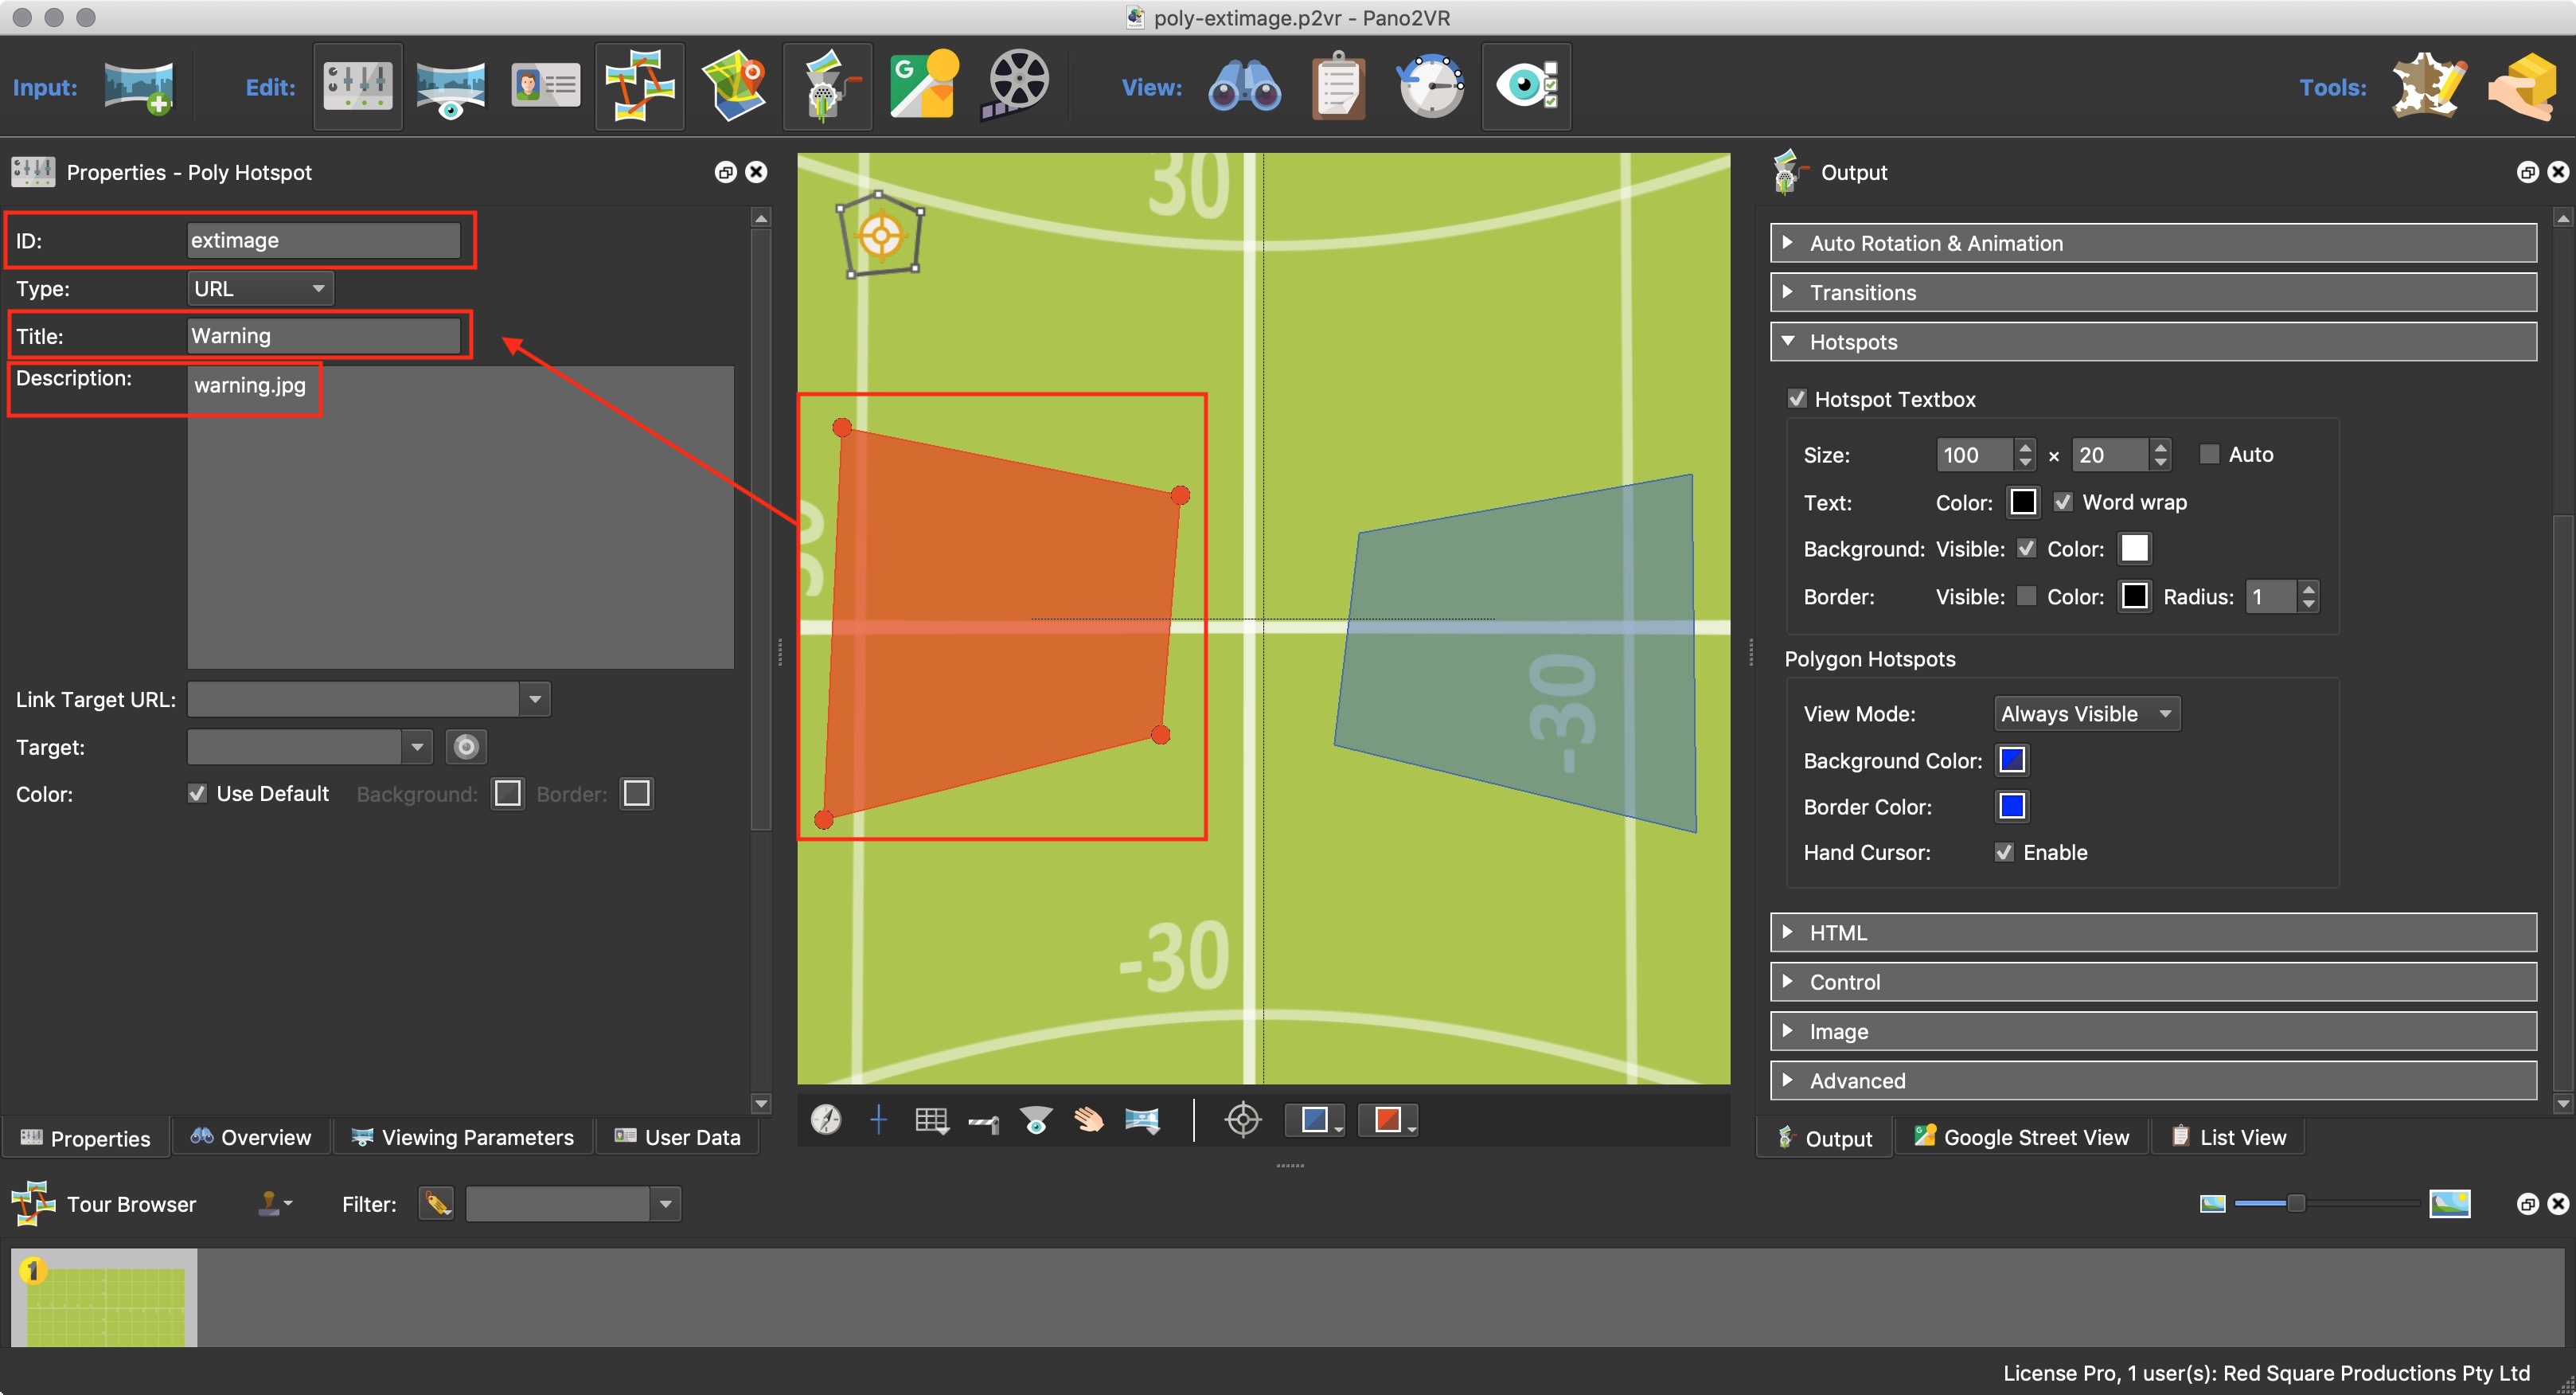
1. Create two polygon hotspots in the Pano2VR viewer
2. Give both polygons the same ID: (in this case extimage for external image)
3. Add a title if you want a thumbnail, if not leave it blank
4. Add the name of the image (in this case warning.jpg and klaxton.jpg) into the description field
- poly-ext0.jpg (486.83 KiB) Viewed 1766 times
5. In the skin add a 'Draw external image' element into the canvas (in this example I've named it extimage)
6. In Appearance set the 'Visible' Unchecked.
7. In External Image set 'Content Scaling to Fill'
8. in the Advanced set the 'Hotspot Proxy ID' to the ID name you assigned to the polygons. (in this case extimage, this allows us to associate the skin element with the element/s in the Project Viewer)
9. In the Actions add the Action shown in the image. (When the mouse is over the polygon, it sends the value, of the Description of the polygon the mouse has entered, to the External Image element.
10. Save and close the skin, output the project.

- poly-ext1.jpg (829.63 KiB) Viewed 1766 times
Note: make sure to place the images into the output project folder.
Nots: I've also added a little drop shadow to the Draw External Image element by adding a CSS style box-shadow: 5px 10px 8px rgba(0, 0, 0, 0.4); in the Advanced - CSS Styles Inner Element text field.
You can download a zip containing the project and output here
https://s3-ap-southeast-2.amazonaws.com ... ternal.zip
cheers,
Tony
